|
How To Start Your Garden/Mini-Farm
By:
Special K
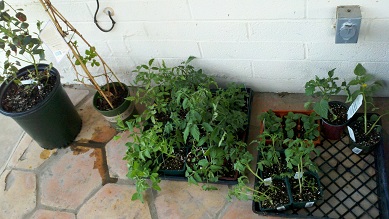
Most of us, if we are lucky, have had some REAL fruits and vegetables in our lifetime. Not the stuff that sits on the grocery store shelves for days or weeks that has not ripened, or has been genetically altered in some way and tastes like cardboard. But the REAL thing. The produce that has had a lot of generational integrity and has been cultured by you to maturity. I am talking about gardening! Although gardening has been around for eons with lots of success and tried and true methods, it has truly become a lost art in the last century. Especially with the dawn of the industrial age and the processing of our foods, much of the real nutrient content in our foods has all but evaporated. We may choose to grow some or all of our own foods for various reasons, such as for taste, for health, and/or for knowledge. Whatever your reasons are, we all benefit from sharing our experiences with others about what we have actually done. On that note, I would like to share with you my gardening experiences that I have had over the last couple of years so that maybe you will learn a little bit (or a little bit more) about the subject and move into action. My knowledge base will take you from plotting out your garden to harvesting your crops and just about everything in between. First of all, you will need to decide when you want to plant your garden. There are so many factors that come into play when making this determination that there are no set dates for planting. One main factor is determining the best time to plant for the area you live in. If you want a spring garden, this means that you will harvest your vegetables in the spring and will need to plant your seeds in the latter part of winter. Summer gardens will need to be planted in the first part of the spring (after the final frost), and fall vegetables need planting in the mid to late part of the summer. When planting spring vegetables, make sure that the weather is around 50 degrees in the evening. When the weather gets a little warmer (evenings at 60-70 degrees) it is a good time to plant summer vegetables. When you see labels that say whether something is a ‘warm’ or ‘cool’ season crop, this refers to the outside temperature and not necessarily the time of year. Vegetables that may not be ready to plant in one part of the country may work very well in another part of the county during the same time of year. So temperature is a major factor when planting because seeds will germinate (sprout) much easier if they have the correct temperature. Look at the instructions on the seed packets for guidelines as to when is the best time to plant. Some general guidelines exist, however, and you can apply them in making a determination of what to plant and when. For example, cool crops are those that can be planted in the spring such as lettuce, Brussels sprouts, cabbage, onions, cauliflower, and broccoli. Warm crops are those that won’t survive a late frost without some kind of protection, and will do well in warmer temperatures. They include vegetables like eggplant, tomatoes, and peppers. Tender crops, such as melons, squash, and cucumbers can be planted early spring/summer, but will need to be covered when they are germinating to help keep the soil warm. If you live in a cool climate or want to start your seedlings indoors, you will need to start them about a month before they will be ready to plant in your garden and about 2-2.5 months before you want to harvest them. You can plant the seedlings in anything from small paper cups to something more elaborate such as seed starting wafers ( Wonder Soil offers several to choose from). 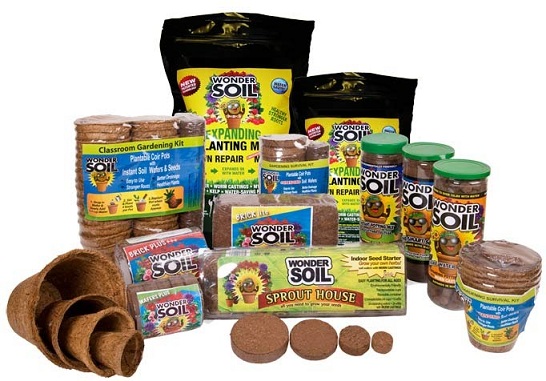 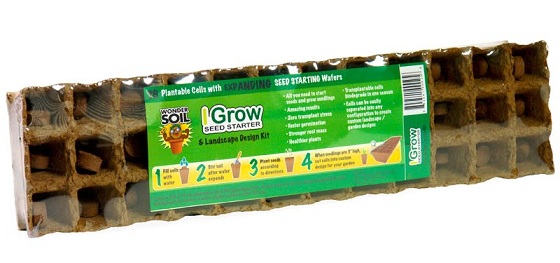 Whatever you decide to start your seedlings in, make sure the soil is good (gardening soil will work - you can purchase this at any hardware or home improvement store, or use Wonder Soil‘s expanding soil wafers) and keep the seedlings warm and moist while they are germinating and growing. When seedlings get to be about 3” high, then they are ready to transplant into the garden. (More on this later).
Next, you will need to start by picking a place with which to do your gardening, whether it will be in a plot/pot/bucket/container/hanging basket…whatever. This step is important, but also the one that we have the least control over to some degree, because you must make good use of the area that you wish to grow your vegetables, fruits, spices, etc…to make sure your plants get the necessary light for you to get the maximum yield. 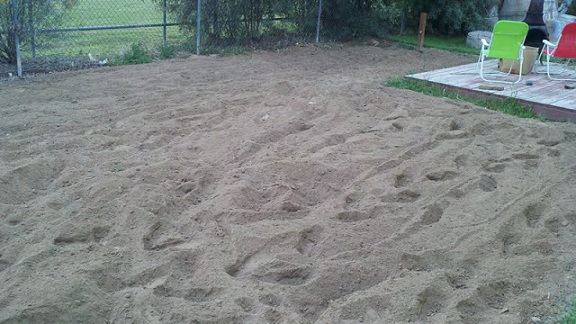 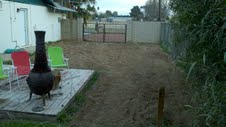 You will need a good amount of sunlight for your vegetables to grow, so make sure you can give them at least 6 hours of sunlight a day. Remember - sunlight is food for your vegetable plants and if you don’t feed them enough, then they will suffer (and so will you). Leaf and root vegetables (such as kale, carrots and lettuce) will tolerate some shade while vegetables that produce fruit (tomatoes, peppers, squash, zucchini) need full sun. That being said, I live in the heart of the Sonoran desert where we have an abundance of sun - and heat. I have placed my tomatoes, for example, where they will get at least four to six hours of direct sunlight. But in the afternoon, when it is ridiculously hot, the tomato plants are shaded by a tree and they are doing very well and I would imagine that they appreciate some shade! The tomato plants get enough direct sunlight and are also supplemented by solar ambient light (rays from the sun that bounce off of surrounding objects) that the plant will still get the necessary amount of light that it needs for growth, but the tomato plants really struggle when they have full, direct sun all day in a very hot environment. They will do better in full sun if the temperatures are not so scorching hot. On the other hand, I also have a watermelon plant that gets only a little shade in the early morning, but gets full sun late morning, afternoon, and early evening. And it is growing like crazy, so it depends on the plant and what it will tolerate. You will get to know the ‘personalities’ of some varieties over time as you do your gardening year after year, and it will become easier to know what they like (and what they don’t like). That is why it is so crucial to learn some basic gardening principles while we still have a food supply to back up whatever goofs we make in the garden. If it ever gets to the point to where we are relying solely on our gardens and our stored foods for our short or long term sustainability, it is a good thing to know ahead of time what and when things will grow so that we are ahead of the learning curve and our chances of maintaining a healthy existence in the midst of chaos will greatly increase.
Thirdly, you will need to prepare your soil. Some of the reasons to prepare the soil are to loosen it up, to strain out unwanted elements such as rocks and grass, and to allow for better nutrient absorption. To help prepare the soil, a rototiller makes the job a whole lot easier. If you are starting completely from scratch and will be digging up part of your yard to make into an area for gardening, then it is a good idea to rent a rear tiller from your local equipment rental store (this is a larger, more powerful tiller that will dig deeper than something like a smaller Mantis rototiller). 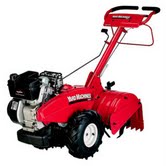  Before tilling, water the area you are going to dig first and let it soak in for a day to soften the soil, then use the tiller to tear up the soil. Once the soil is loosened, then you will need to sift the dirt to get rid of the grass, weeds, rocks, etc… 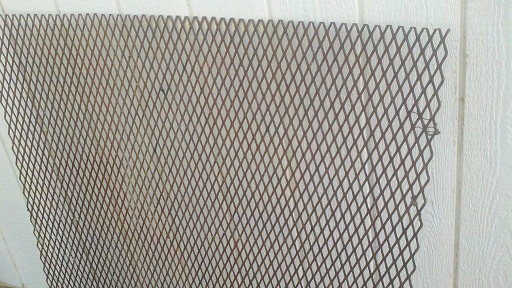 You can purchase a piece of metal mesh screen for sifting (we used an old piece of hard steel mesh that was leftover from when we built a tailgate for our trailer, and it works great as a sieve to strain out all the stuff we didn‘t want in our soil). A large wheelbarrow is helpful here to have something to sift the dirt into, but if you don’t have one, you can try putting the mesh screen on top of some old milk crates and shoveling the loosened dirt on top of the screen so that it will fall thru the screen back onto the ground. When you have finished sifting all of the dirt in your garden plot, make an appointment with the local massage therapist because your back will be killing you at this point. After you are able to stand up straight again, take a garden rake and spread the sifted soil evenly over your plot. Next, you will need to fertilize the sifted, raked soil. There are many sources for garden soil fertilizer, such as: 1) Your own compost (if you have the time for it, but the compost you use has to be broken down organically so that it is useful for feeding your garden plants); 2) Local compost (there are always things like this on Craigslist - you just type in manure, and you will have all that you need. You just have to go get it! But keep in mind here that this fresh manure needs to break down - or decompose - too. You will need to really plan ahead here because the fresh manure will need to be put in the garden plot a season or two earlier so that it can decompose. Technically speaking, decomposition is a biological process that includes the physical breakdown and biochemical transformation of complex organic molecules of dead material into simpler organic and inorganic molecules. That’s too much technical information, but just know that the soil needs to go thru a regeneration process to where it will change the complex organic material into simpler organic material that can be used by the plants. Just like anything else in gardening, there are different ways of composting ( cold vs. hot composting for example). Using fresh, uncomposted manure on your garden will burn the leaves and roots of your growing plants - too much nitrogen and ammonia. Plus, it stinks…), or 3) What I usually do is go buy steer manure by the bag from the local hardware or big box home improvement store. It is ready to use (has already decomposed), and you can’t beat the price at $0.97/bag.  However you decide to fertilize your garden soil, make sure that the soil remains loose and not packed. That way, the nutrients and water will have an easier time getting to the roots once you have your plants in the soil. Again, use a garden rake to mix the sifted soil with the fertilizer of choice and spread the mixture as evenly as you can over your garden plot so that you minimize making hills and valleys in your soil. 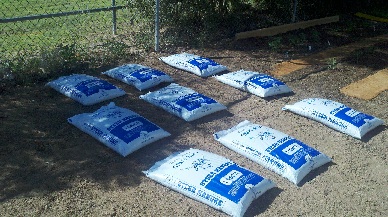 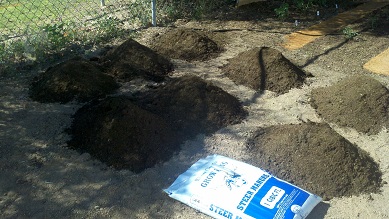 Otherwise, when you water your garden, the water will pool up in the lower level areas which may take it away from where you want the water to be. Try to keep from walking on the freshly tilled and fertilized soil as much as you can. It will be difficult to keep totally off of it in light of the fact that you still have to put your seeds or seedlings in the soil, but try to keep it at a minimum so that the soil remains loose.
Next, you will simply want to water the garden plot that has been tilled and is now fertilized. You want to get the soil pretty wet so that the water can soak in a few layers deep, but not so much that you are flooding the soil. I usually water the prepared soil late in the afternoon and let it just sit for a day or two after fertilizing with the steer manure, and watering it so that the nutrients from the manure will begin to leach into the ground.
Now, you will need to decide what you want to grow and how you want to start the plant(s). 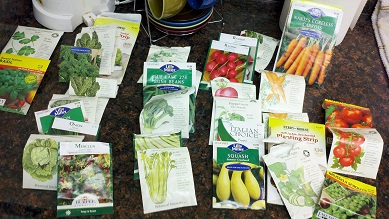 You can either plant the seeds directly into the ground, or you can transplant seedlings into the ground once the seeds have germinated/sprouted, or you can buy the seedlings from a local nursery that are ready to plant). I have had better luck planting the seeds directly into the prepared soil because they don’t suffer from transplant shock (yes, transplanted seedlings are very sensitive to any changes in temperature, light, moisture, etc.. and many times will have a hard time adapting to a new environment). Also, another thing to consider is what type of seed(s)/plants you want to harvest - by that I mean do you want to plant only seeds/seedlings that are from nature and/or have natural mutation, or are you going to use some type of genetically modified product? I can only guess here, but I would imagine that most of us would want to use the natural, unmolested, unchanged seeds/plants - they are called Heirlooms. 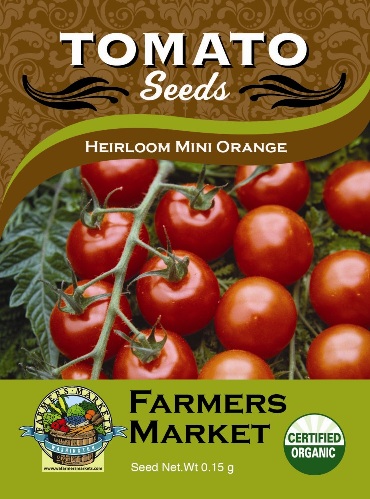 A more correct description here would be non-hybrid. This is a very important issue that has come up over the years because it is becoming increasing more common to find the GMO (Genetically Modified Organisms) seeds/foods than the natural, unchanged varieties. The companies that provide the hybrid, GMO seeds/plants have engineered these seeds/plants to produce their own ‘pesticide’ so that they are resistant to bugs and many things that would destroy the plant while it is growing. On the surface it sounds good, but that’s where the goodness ends. When you eat the produce that comes from this type of GMO product, you are eating a genetically engineered organism that actually becomes part of the bacteria in your digestive tract. While the long term effects of eating these GMO’s are not yet fully known, scientists do know one thing for sure and that is consuming genetically modified plant DNA leads to the development of GMO microorganisms which reproduce continually inside the human body. The long term consequences could be deadly, and at the very least seem to have some type of incompatibility and/or insufficiency in the body in providing the perfect balance of nutrients at the microscopic level. Also, when you plant large crops with these GMO’s , they contaminate and cross-pollinate any natural/heirloom varieties that may be in the area and turn the heirloom crops into genetically modified crops. Once you decide what you want plant, you will need to decide how you want your garden to be layed out. The very first garden I did several years ago, I took a 16’X20’ plot and planted the whole plot with seeds. Sounds good, but what I did not realize until later was that it was very hard to walk thru the garden without messing up the soil and getting muddy. So what I have done in successive gardens was to plot out smaller sections within the main garden plot that I would outline with old remnants of carpet or strips of coroplast to use as walkways. I made the smaller sectioned out plots about 3-4 feet wide so that I could reach all the way into the smaller plot from either side. 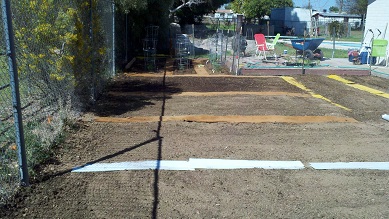 That way, it is easier to plant, easier to do the weeding, easier to feed the plants, and easier to harvest. Now for the actual planting. If you are going to plant your garden from seeds sewn directly into the ground, it is best to follow the planting instructions on the seed packet for seed spacing and depth. If you will be transplanting seedlings you started weeks earlier, make sure the soil is moist before laying the seeds or transplanting the seedlings. Many ask about how deep to plant your seeds, but in general, a good rule of thumb to go by in knowing how deep to plant your seeds is plant them 2-3 times the diameter of the seed. Then, loosely cover with soil. It’s ok to press down on the soil a little bit just to set it in the soil, but don’t press on it so much that you have compressed the soil with the seeds into a brick. Once you have put in all your seeds, you will want to lightly water them. In damp climates, you may just have to do this once every couple of days or once a week. In the desert and drier climates, you will have to really be diligent about keeping the soil moist (but not flooded) and that means lightly watering it a couple of times each day. Do not let the soil dry out OR get too wet. If the soil gets too dry, the seeds won’t germinate, and if the soil is too wet, the seeds/plants may get moldy and/or rot. Now if you want to start the seeds in Styrofoam cups or in seed starter containers 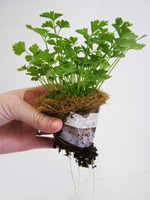 first until they become older seedlings, the same principle applies in that it must be good, rich soil and that the soil must be moist before putting in your seeds. If using a cup or seed starting container, you won’t need much soil at first here to get the seeds started. A bag of garden soil will do the job. Fill each cup/seed starter with garden soil, moisten it (a couple squirts of water from a spray bottle work well for this), put two seeds into each cup/seed starter and lightly cover seed with more gardening soil. You can also buy seed starters that are the soil (seed pellets or seed plugs) 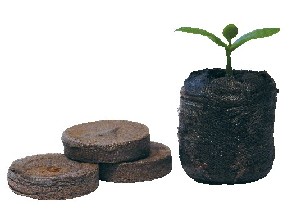 and for these products, you put the seed directly into the pellet/plug and spray with water. Either way that you try to plant your seeds, make sure you plant two seeds in each hole. I didn’t understand this at first, but the reason we are told to plant two seeds instead of one seed in each hole is so that you will have a better chance that something will sprout (if one seed doesn’t make it, the other one will). Once you have planted all the seeds and/or transplanted the seedlings into the garden, it’s a good idea to map out what you have planted and where you have planted them in the garden by writing it down on a sheet of paper. Sometimes, you might plant two or three types of peas, for example, and you want to know which one you like best or which one does better for your climate, so if you mark everything down, you will be able to keep track of it. Another minor thing to consider here is that you may want to stagger planting certain things within the same growing period. For example, if you want to plant lettuce, pick out a spot where you want to plant it, sow lettuce seeds into 1/3 of that area, then in three weeks sow the next 1/3, and in another 3 weeks or so, sow the last 1/3 of the lettuce plot. That way all your lettuce will not be ready all at once, but you will continue to get a new crop even after the first one that was planted is at the end of its usefulness. Now, once you have finished planting and/or transplanting, you will do a lot of waiting, weeding, and feeding. If you have planted seeds directly into the soil, it is always exciting to see them sprout (some usually within several days). If you have transplanted seedlings into your garden from small containers, a little boost of B-vitamins will help with the shock of being moved. 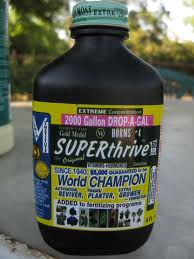 Also, you will have to keep up on the weeding, because as you know, weeds are very easy to grow and if you are giving the garden plot lots of nutrients, the weeds will always find a way there. Also, most home gardeners do not want to put pesticides or weed killers in their gardens because of the dangers they pose to their health. The reason you want to keep the weeds out of your garden is that they compete for the water and nutrients you are feeding to your vegetables. Some of the weeds can get very large very fast and they take up a lot of space and crowd the garden so that the vegetables also have to compete for space with the weeds. You will also need to ‘feed’ your garden plants a number of different chemical elements, mostly nitrogen, potassium, and phosphorus, which are the main ingredient in plant food. They also need air and water (where they get carbon, hydrogen and oxygen). Please go to What is fertilizer and why do plants need it? for some great information on the components of fertilizer and how you can see what ratios of these elements are in certain plant foods. There are several commercial plant and garden foods available. I have used fish emulsion in the garden about once a month to help boost the nutrient content for the garden plants. 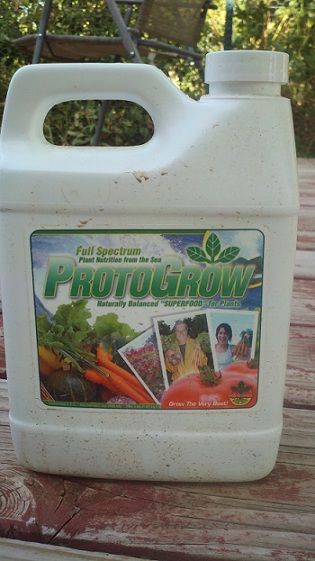 That is what makes aquaponics so successful because it uses fish waste (which can be toxic to fish in high concentrations), and delivers it to the plants (usually fed thru some type of tubing system). The plants can then use up the vital nutrients in the fish waste and by doing so, it will cleanse the water. Then the water is recirculated back to the fish tank/pond and is now clean water for the fish. Go to Fish Emulsion for more information. Another reason to use natural and organic fertilizers and soil amendments: earthworms love them. Earthworms are extremely beneficial in the vegetable garden; increasing air space in the soil and leaving behind worm castings (worm poop). Do what you can to encourage earthworms in your soil. You can get them wherever you get fish bait. Also, there are insects that are good for your garden as well. Many insects can simply be a pest, eating everything in sight, but there are four insects that are good for your garden: 1). Bees - As discussed earlier, bees are good pollinators. They help your garden plants develop into tasty vegetables; 2). Dragonflies - While pretty to look at, dragonflies will eat pesky mosquitoes and other garden pests that can be destructive to your garden plants; 3). Praying Mantis - The praying mantis will eat whatever it can catch (will eat the good bugs along with the bad); and 4). Ladybugs - Ladybugs can eat a lot each day. They can eat tons of aphids and will feast on other garden pests and larvae. While encouraging some of the garden-friendly insects listed above can help keep your garden from being overrun by destructive garden pests, you can also try Food Grade Diatomaceous Earth (technical term is fossilized phytoplankton powder). 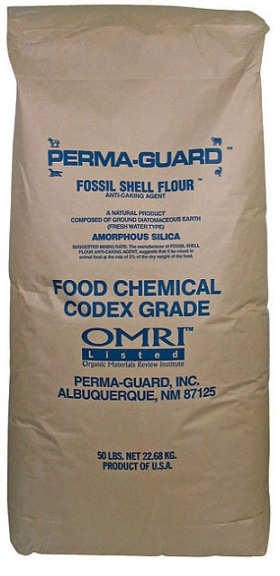 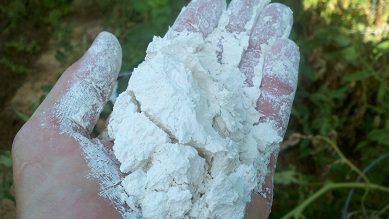 DE is a microscopic dust that has razor sharp edges and to small insects, it will pierce their exoskeleton and cause them to dehydrate and die. It is not a poison, but rather works by mechanical means to get rid of unwanted critters around your garden (and house, for that matter). It is safe for humans and animals, however it is best not to breathe this fine powder as it may aggravate the mucous membranes in your nose and mouth. Also, if you have gophers in your garden, it will be tough to get rid of them, but here are some of the things to try. Some gardeners swear by marigolds and green onions, for which gophers are said to have a particular distaste. Experiment by planting marigolds and green onions in and around your garden to discourage gophers from coming around. Mothballs, garlic, spearmint leaves, and a perimeter of mole plant or castor bean planted around gardens have all provided mixed results. Some say putting ammonia down the gopher tubes helps, or just get a cat and see what happens. These control strategies may be experimented with where gophers are an occasional problem, but they and generally not a long-term solution. For keeping birds out, bird netting works well, is readily available, and is fairly inexpensive. So it is important to know which things are detrimental and which things are beneficial to your garden. It is really frustrating to go thru the process to get to the point where your vegetables and fruits are just getting ripe and all of a sudden, they are eaten up by pests (large and small) overnight. That is a lot of hard work and expense gone down the drain.
While you are waiting for your garden plants to grow, there are other things you may consider doing to help protect your garden depending on where you live, and how much you may want to ‘automate’ it so that you are not spending every waking moment in it. Things like fencing, shading, and an automatic drip system are just a few. FENCING: If you live in a rural area, you will almost certainly want to keep your garden protected from large predators (such as deer, rabbits, coyotes) so putting up a perimeter fence around the garden is essential. I live in a large city, but still put up a fence around the garden to keep the goats, chickens, rabbits, and dogs out of it. I used some old metal sign posts (have been collecting these for years after political elections when candidates would fail to take down their signs and posts and they become fair game for anyone who wants them), a post hole digger, some chicken wire fencing, and wire ties. Took a couple of hours, but it will only have to be done once. 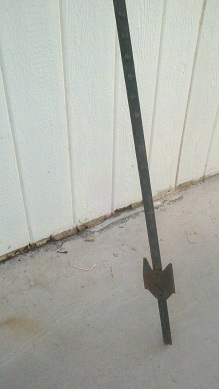  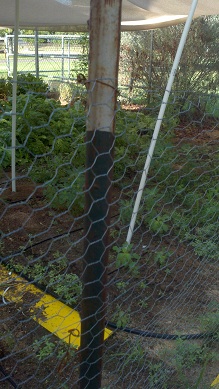 SHADING: Next, shading the garden was an essential part of our summer gardening since we live in a very hot, dry climate with lots of sun, but putting it up took some time. It is a semi-permanent structure, so it was a little challenging to make it work without making any permanent fixtures, but the materials I used were nine 5 ft. long rebar stakes, nine 8 ft. long ¾” PVC pipes, eight 5 ft. long ¾’ PVC pipes, tarp clams, nylon twine, and six 6 ft. X 20 ft. shade cloths designed to filter about 70% of UV rays. 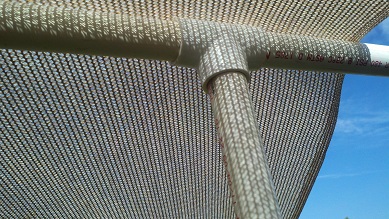 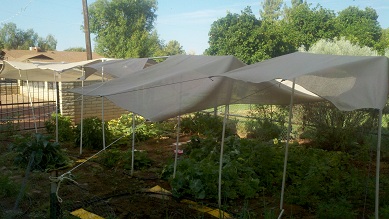  To make the shade canopy, I drove each 5ft. rebar stake into the ground about 5 ft. apart with a post hole digger, then slipped the 8 ft. long, ¾” wide PVC pipe over each rebar stake and pushed the PVC into the ground about 1 foot (so now 7 ft. of PVC pipe was sticking out of the ground). I did this for the entire length of the garden and all in one straight line running the length of the garden, so now I had nine 7-ft long PVC poles sticking out of the ground at 5ft increments. Then I attached PVC t-connectors to the top of each 7 ft. PVC pole (using elbow-shaped PVC connectors on the end poles) and connected the nine 7 ft. ¾“ PVC poles together using the 5 ft PVC pipes connected to each t-connector/elbow to create a frame for the shade cloth to drape over. We put tarp clips on each corner of each shade cloth, attached 5 ft. lengths of nylon twine to each tarp clip, draped the shade cloths over the PVC frame, and tied one end of the shade cloth to a chain-link fence on one side of the garden, and the other end was tied to the metal perimeter fence posts on the opposite side of the garden. Now the shade cloth covers about half to two-thirds of the garden and by doing it this way, the temperature will be reduced by about 15 degrees which is crucial to keep the garden from getting fried out by the sun’s heat. An important thing to keep in mind here is that some parts of the garden are going to be in the sun at any one time, and some of it will be in the shade. As the sun moves across the sky, it is at different angles at different times so that each part of the garden will get at least some measure of full sun every day, while also getting to be in the shade for other parts of the day. I have found this works well for me in the climate I live in. You may live in a climate that is begging for more sun and/or warmth, so you can adjust it accordingly for your area. The shade structure can also work well in the wintertime to provide protection from frost/freezing temperatures. By enclosing the shade structure you will create a little micro-climate within the structure, especially if you add a heat lamp (I use the same 250W infrared bulb used to keep baby chicks warm) on the coldest nights during the winter and it keeps the garden plants from freezing. One thing to know is that many of the garden plants will survive the cold, just not the frost. As long as they are established plants when the weather turns cold, they may grow a little slower, but they will still produce for you as long as they don‘t freeze. AUTOMATIC DRIP SYSTEM: 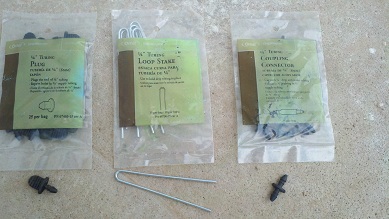 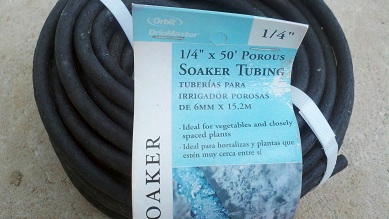 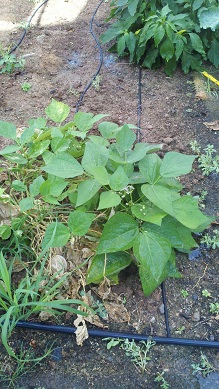 Supplies used for the automatic drip system I installed in my garden this spring are 700 poly hose, ¼” soaker tubing, ¼” couplings, ¼ “ tubing plugs, figure 8 end clamps for 700 poly hose, hole puncher, Raindrip automatic timer, and a PVC hose coupler where one end attaches to the timer while the other end attaches to the 700 poly hose. Design how you want to lay out your watering delivery system. Each garden will be different in how it is laid out, but the main thing to keep in mind is that the 700 poly hose is the main line coming from the spigot, and many smaller soaker hoses will branch off of the main line and be where the water sweats/drips out into your garden plants. You can cut the 700 poly hose and the soaker tubing to whatever lengths you want, using the figure 8 end clamp at the end of the 700 poly hose. Use the hole punch to punch holes in the 700 poly hose where you want to connect a length of soaker tubing. Use the ¼” couplers to attach the soaker tubing to the 700 poly hose where you punched your holes, and the ¼” tubing plugs to plug the other end of the soaker tubing. Although this will also take some time to set up, once you do it, you can keep using it year after year and just maintain the sections that might need some attention as needed. This was a great time saver for me since I have to water twice a day in the heat of the summer. Now, I can just turn on the water for an hour in the morning and an hour in the late afternoon (or if I can’t be there, the timer will turn the water on and off for me at times I pre-select). By about a month and a half or so, your garden plants will have grown significantly (some grow out like cucumbers and watermelons and will spread out all over your garden!), some grow up (like tomatoes, peppers, and corn), and some grow in the ground (like carrots and onions). It is around this time that you will start to see flowers on your garden plants (at least on the ones growing out and up). These flowers are where the vegetables/fruits will grow if they are pollinated. Now this has become a very big issue as of late since it seems like many of the people that I have talked with in my little gardening community have said they have big, beautiful garden plants with lots of flowers, but not many fruits or vegetables are growing on them. I have experienced this as well, even after careful planting, watering, and fertilizing. I think one of the main problems here is that there are a lack of bees to do the pollinating. There are some that think all of the cell towers that have been put up over the years has affected the bee population, as well as a lot of growth in our cities and towns that tend to push out the bees. I can’t say for sure that these things are true, but it sounds at least plausible that they might be contributing factors in the low numbers of bees being reported. Click on Study: Cell phone radiation could be responsible for bee population decline (Video) for some information on the worldwide declining bee population. Another factor that can contribute to low vegetable/fruit yield in the garden are extreme hot or cold temperatures. This can cause the plant to produce only male flowers and render any pollination attempts to be ineffective. So these are some of the issues that you need to be aware of when looking to get the maximum production from your planting efforts. In this section we will look at ways to help the reproduction process along if you think that your flowers are not being pollinated. Now, there are some garden plants that are self pollinating (pollen from one flower can pollinate the same flower). Some of the plants that are self pollinating are tomatoes and peppers. There are also some garden plants that have male and female flowers, such as zucchini. But most of the garden plants need some help. In addition to bees, butterflies and hummingbirds, wind will aid in pollination. If you don’t get a lot of wind where you live, you can take a leaf blower across your garden (not full blast, but enough to give it a nice breeze so that the pollen can be moved around) to help the process along. Or you could give your plant a good shaking every day or so to redistribute the pollen where it needs to go. Also, hand-pollinating (with a feather, Q-tip, or small tipped paint brush) can be used to transfer pollen from male to female flowers, or from male parts of a flower to female parts of a flower. To do this, go to Pollination for a detailed description and drawing of the inner workings of a flower, and which parts are male vs. female parts.  One male flower can pollinate several female flowers.
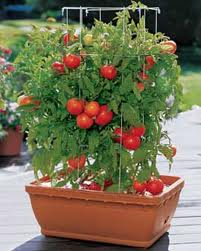
This article has dealt mostly with gardening in the ground, but I have done other types of gardening as well that I will very briefly touch on here. I tried container gardening, but it did not work very well for me (container gardening is when you plant your seeds or seedlings in a pot or other large container) - I did it for one season in the summer and I think that the ambient temperature was too hot around the planter that it did not promote a healthy plant. Remember that temperature is one of the key factors to successful gardening. I plan to try some container gardening in the cooler months to see if that works better. I have also done hanging plants (specifically, tomatoes).  I did it for two seasons. The first time I tried hanging tomato plants was in the winter/spring season and they did fairly well, producing a number of good quality tomatoes (not as much as the in-ground tomatoes, though). The second time was in the summer here (in Phoenix, AZ). Not a good idea, because, once again, the heat was a factor in stressing out the tomato plants so that they produced very little. Now after about 3 months or so from when you first planted your garden, you have done everything you can to ensure that your garden has what it needs so that it can provide you with the fruits and vegetables of your labor, you just have to wait until the fruits and vegetables grow to maturity. For the most part, you will know when they are ripe. If the fruits and vegetables start to whither and dry up, then you have waited too long. One of the best reasons to do a home garden, aside from the fact that you have fresh food, is that you can allow the fruits/vegetables to ripen on the vine. By doing this, you will get the best flavor, juiciness, digestibility, and nutrition. Most of the flavor and juiciness comes from the fruits/vegetables being able to stay on the vine longer so that they can grow to maturity. Also, if you are eating un-ripened fruits and vegetables, it is harder for your digestive system to break them down in your body and can give you gas. And the most important reason for giving your produce the opportunity to fully mature before you pick it is because you will get a full spectrum of vitamins and minerals in a perfect balance that your body was designed to utilize. Our bodies were designed to operate very efficiently if we give it the right fuel. Much of our food supply has been compromised because of the mass production that leads to lower quality, pesticide filled foods that have been deprived of much of their nutritional value. Eating foods that have very little nutritional value starves our bodies of the very things that will keep it’s immune system functioning properly. Immune system cells talk to each other and relay messages by way of an extensive network of tiny tunnels and are capable of long distance communication and information exchange. When a foreign invader is present (virus, bacteria, fungus, etc…) the cells can relay critical information very swiftly on how to deal with this invader. As a matter of fact, this happens every day. What happens when we don’t eat the right foods is that these immune system cells are compromised and there is a breakdown in communication and many things are allowed to proliferate in our bodies that otherwise would be stopped. Additionally, compromised immune system cells can fail to recognize things that might be good for our bodies, but because of poor communication, will destroy healthy body tissues (auto-immune). That is why it is so important to give your body the proper nutrients so that it will promote a healthy, functioning immune system response when it is called upon to do so. Nursing homes and hospitals are full of people that have not had the proper nutrition and have all of these diseases that are causing them great pain and expense. Some examples of auto immune diseases are lupus, multiple sclerosis, psoriasis, restless leg syndrome, rheumatoid arthritis, vasculitis, celiac disease, Crohns disease, diabetes mellitus type 1, Guillain-Barre syndrome, and on and on. Chances are that we all know someone who has one of these ailments. What you will come to learn is that gardening is a lot of hard work, but it is a labor of love that we should all do for our families. Nothing worth having ever comes easy, and that is certainly true of gardening. But, not only will you feel better and have better tasting food, you will learn a valuable lesson in self-preservation if you understand some basic gardening principles. It takes some practice getting to know your plants, your soil, different soil enhancers and soil amendments, what temperatures are suited for certain crops in your area, and forming a community of friends, family, local community organizations, farmer’s markets, etc. with which to build your knowledge base. Incorporating at least some healthy, home grown foods into your daily diet is much better than none at all. Just growing tomatoes on your patio, or some salad ingredients such as lettuce, cucumbers, radishes, etc… whatever you like just to get started is a step in the right direction. And it will prompt others who come to visit to ask questions that just might spark an interest in them to do something as well. So just do it. And enjoy better health. Waiting on you now… 
|